Writing a first DPDK application (Part 1) - For Beginners
I am a software engineer. During my career, I have developed high performance software solutions in multiple domains. I have expertise in:
C/C++, Linux, Data Plane Development Kit (DPDK), VoIP (Voice Over IP) Lawful Interception Systems, Parallel Computing, GPU Computing
In the previous article, I have provided an introduction to DPDK for beginners. It was just a birds eye view of DPDK. In this article, I will provide an in depth knowledge of a DPDK application. If you interested in writing your first DPDK application then this article is for you.
DPDK is a set of libraries and a runtime environment. As stated in the introductory article, DPDK allows us to bypass the OS Kernel and access the NIC directly from your user space application.
Installing DPDK
The first step is to install DPDK on the operating system. The operating system I am going to use is Ubuntu 22.04.3 which is setup on a virtual machine on Virtual Box v7.0.6. The virtual network card is attached with the adapter type of IntelPRO/1000 MT Desktop (82540EM).
Below are the installation steps of DPDK:
Update the packages of Ubuntu OS.
sudo apt-get update -yDownload 23.11.0 LTS (Long Term Support) version of DPDK. It can be easily downloaded from DPDK website. Extract the DPDK package.
tar -xvf dpdk-23.11.tar.xzInstall Python (python3) and Python Installer (PIP). We need Python to run DPDK Python utilities. Install pyelftool package using PIP as well.
 sudo apt-get install python3 -y
 sudo apt-get install pip -y
 pip install pyelftools
Install Meson and Ninja build systems as DPDK source code uses it.
 sudo apt-get install meson -y
 pip install ninja
Install C/C++ compiler, essential tools and libraries to compile our application. We will use the Ubuntu build-essential package.
sudo apt-get install build-essential -yInstall NUMA library. NUMA stands for Non Uniform Memory Access. We will discuss this concept in the upcoming articles.
sudo apt-get install libnuma-dev -yBuild and Install DPDK. After the completion of this step, you should have a successful DPDK installation on your system. All the DPDK header files and libraries will be installed at the default location /usr/local/include/ and /usr/local/lib/ respectively.
 cd dpdk-23.11/
 mkdir build
 meson -Dexamples=all build
 ninja -C build
 sudo ninja install -C build
Binding the NIC to DPDK
After the successful installation of DPDK the next step is to tell the Kernel that from now on we are going the access the NIC directly from our user space program/application. Once we access the NIC directly, Kernel will no longer be able to access the NIC. DPDK provides special programs and utilities to achieve this purpose.
Below are the steps:
Insert the necessary kernel modules which helps to access the NIC directly from user space applications.
Some of the examples of these modules are: uio, uio_pci_generic, igb_uio, vfio-uio etc. We will discuss them in detail in a separate article. For now, we will use uio and uio_pci_generic kernel module to access the NIC directly. Linux modprobe command loads the kernel modules.
 sudo modprobe uio
 sudo modprobe uio_pci_generic
Now deactivate the target NIC interface.
sudo ifconfig enp0s3 downUse ./dpdk-devbind.py utility to show the current status of the target NIC interface. You should see your target NIC interface under `Network devices using kernel driver`.
 cd dpdk-23.11/usertools/
 ./dpdk-devbind.py -s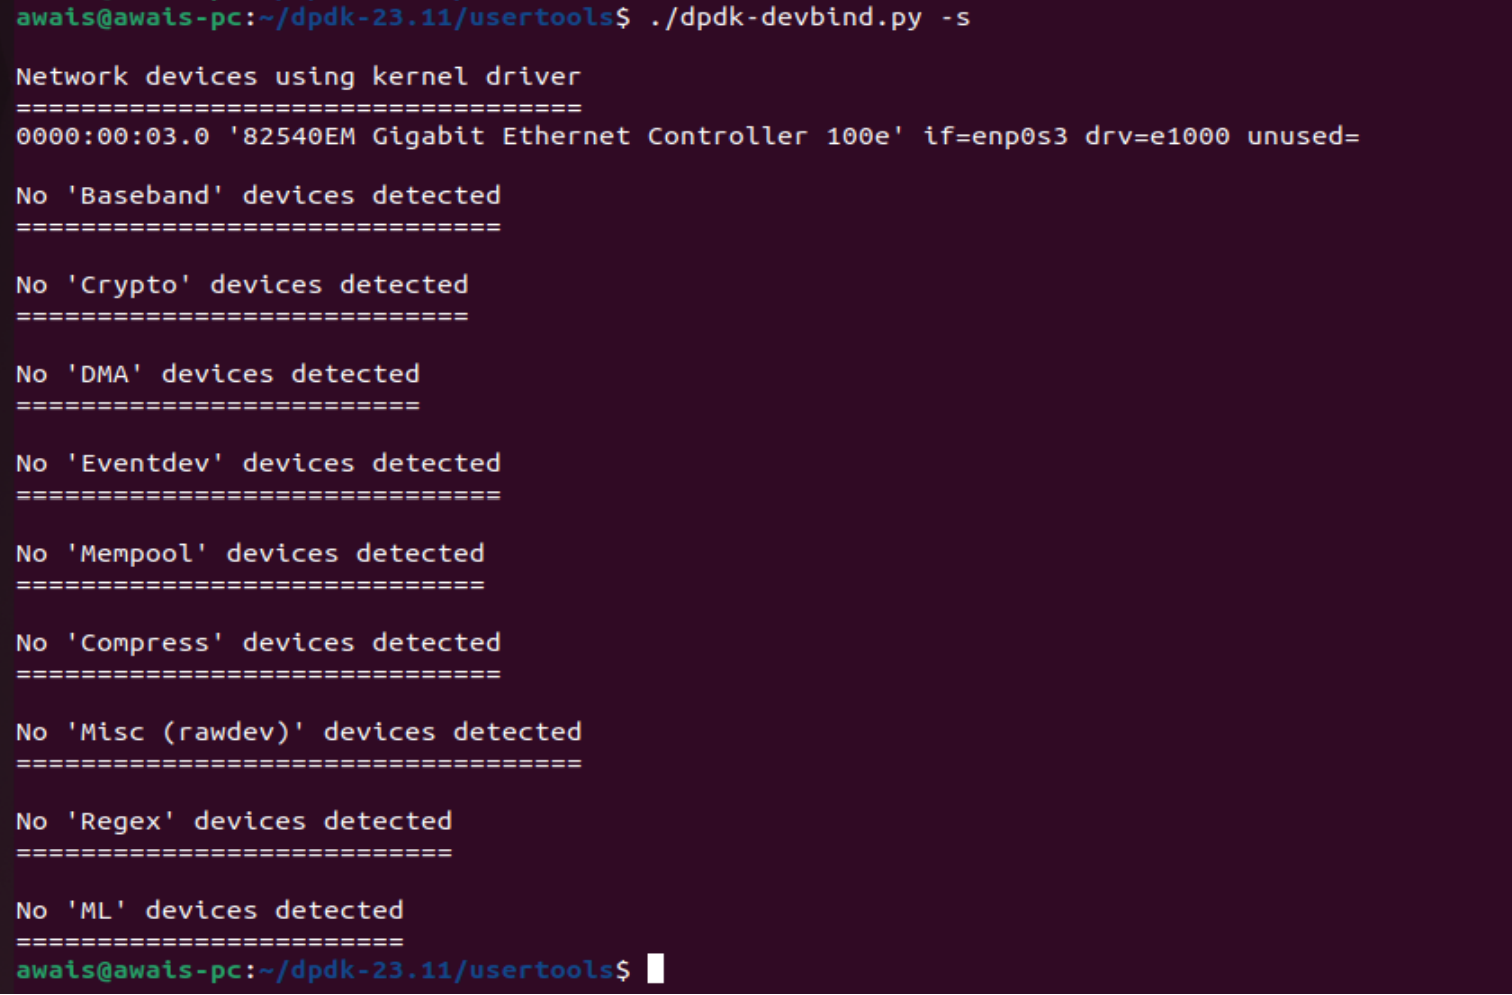
Bind the NIC interface to DPDK driver using dpdk-devbind.py utility. dpdk-devbind.py utility comes as a part of DPDK package.
 cd dpdk-23.11/usertools/
 sudo ./dpdk-devbind.py --bind=uio_pci_generic enp0s3
 ./dpdk-devbind -s
You can see the latest status of target NIC interface by running ./dpdk-devbind.py-s command. The target NIC interface should be present under `Network devices using DPDK-compatible driver`
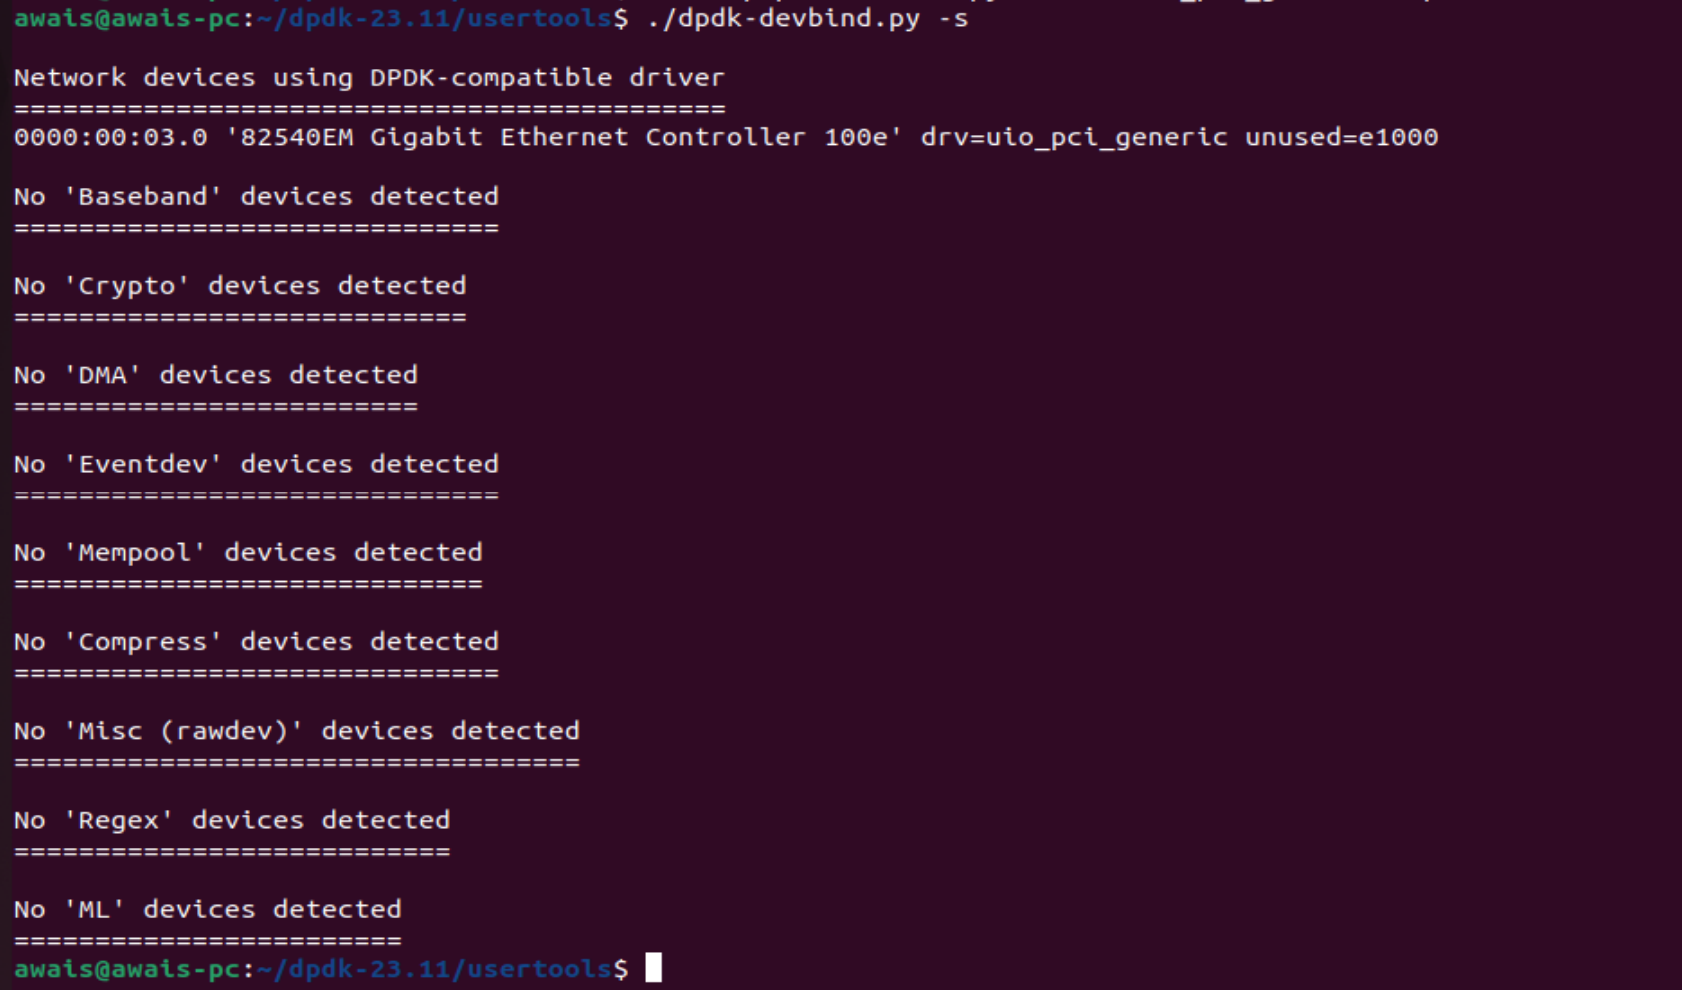
We have unloaded the Kernel driver of NIC interface and loaded the NIC interface with uio_pci_generic kernel module. Now we are able access the NIC interface directly from the user space application.
You will not see this NIC interface in ifconfig command because Kernel is not handling this NIC interface anymore.
Note: Restarting your system will reload the Kernel driver back. Repeat steps 1-3 again to access the NIC directly from user space application.
Summary
This article explained how to install DPDK and setting up NIC interface to access it directly from user space application. In the upcoming articles, we will write a simple DPDK application in C++ to read the incoming packets from the NIC interface.
Feel free to write me in the comments if you are unable to perform the steps successfully, mentioned in this article.